")

IV Cannulation
- Indications
- Cannulae selection
- Equipment
- Pain reduction
- Infection Control
- Technique
- Care after insertion
- Complications
- Removal

Indications
- Fluids infusions.
- Blood transfusions.
- I.V Medications
|
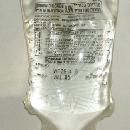
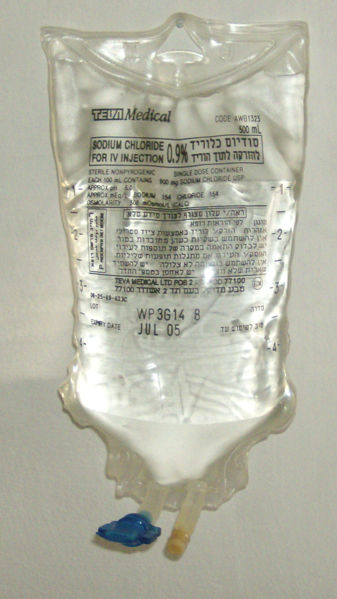
IV infusion |
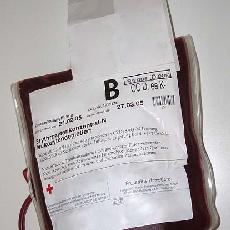
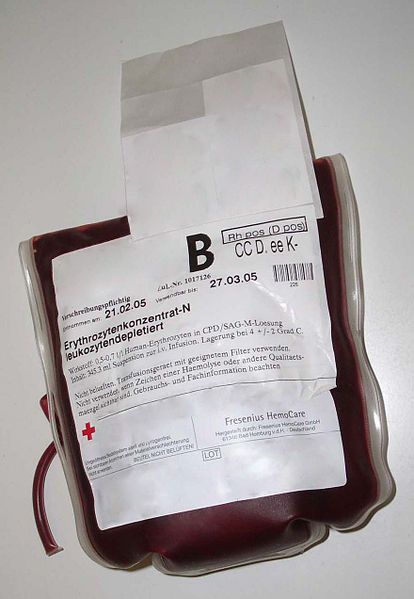
Blood transfusion |
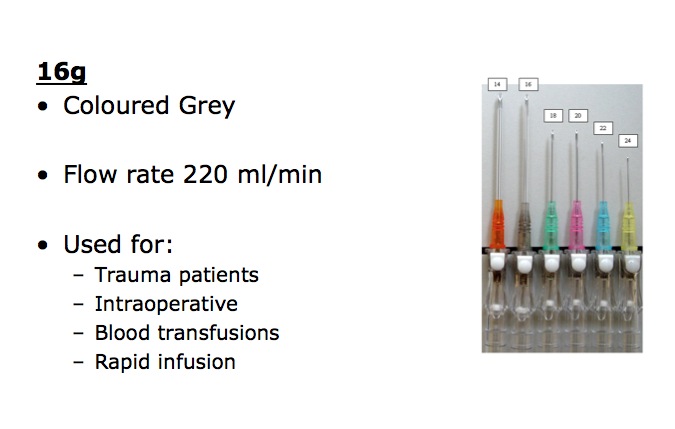
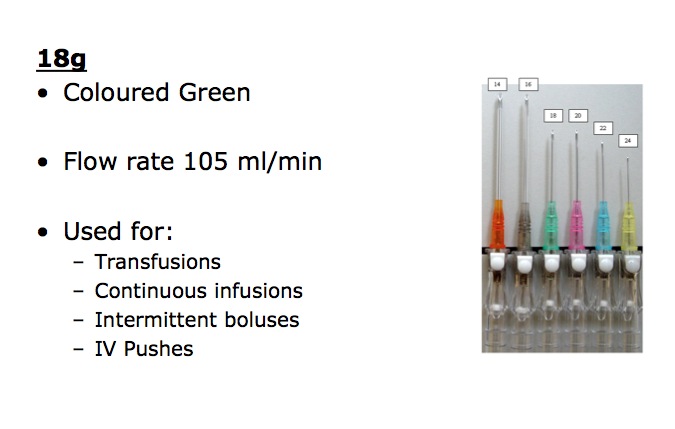
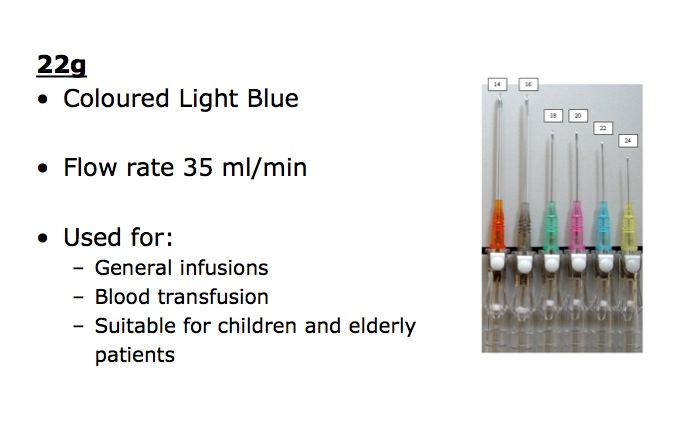
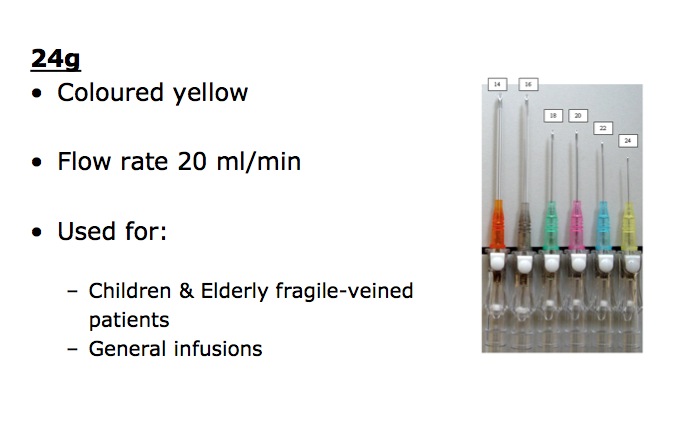
Cannulae selection
When considering the choice of cannula attention should be given to the following:
- minimising discomfort to the patient,
- ensuring good flow rates,
- cannula should be of the smallest practical size to provide the required fluid regimen but take into account:
- the size of vessel cannulated,
- the time scale of the proposed administration of infusion
- the viscosity of the fluid to be infused.
Flow through the cannula is proportional to:
- The fourth power of the radius i.e. 2 x r=16 x flow
- The pressure difference across the cannula (i.e. pressurised infusions flow faster)
Flow through the cannula is inversely proportional to:
- The length of the cannula
- The viscosity of the fluid being administered

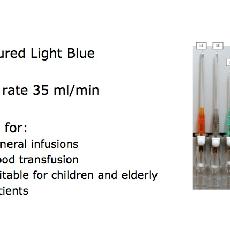
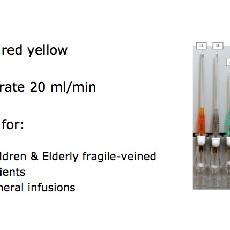
|
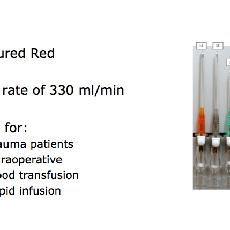
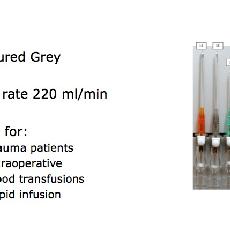
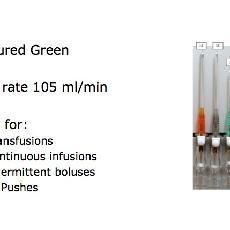
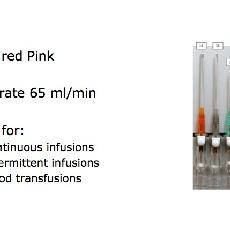
14g |
16g |
18g |
20g |
22g |
24g |


Sizing scale of the French catheter system
D (mm) = Fr/3
or
Fr = D (mm) × 3
For example, if the French size is 9, the diameter is 3 mm. Note that the French scale is a measurement of the diameter, not the circumference (diameter × π).
An increasing French size corresponds to a larger-diameter catheter. This is contrary to needle-gauge size, where the diameter is 1/gauge, and where the larger the gauge the narrower the bore of the needle.
The Stubs Iron Wire Gauge system is also commonly used in a medical setting, and is in fact more common for measuring needles, even though many find the Stubs system to be more confusing because the scale is non-linear and inversely proportional.
The French gauge was devised by Joseph-Frédéric-Benoît Charrière, a 19th-century Parisian maker of surgical instruments, who defined the "diameter times 3" relationship.
In some countries (especially French-speaking), this unit is called Charriere and abbreviated as Ch.
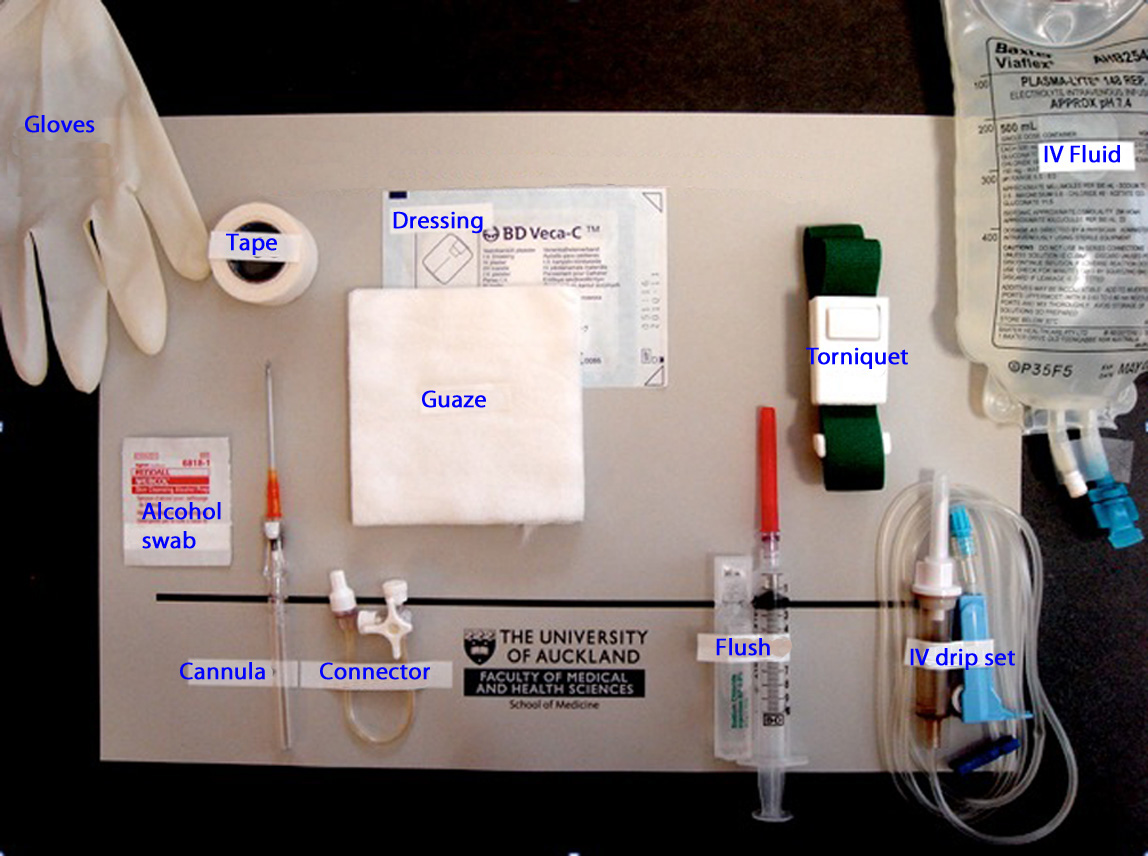
Equipment
IV cannula
Alcohol wipe
2ml syringe
25g needle
5ml amp of 1 % lignocaine solution
Adhesive dressing for fixation of the cannula
Tourniquet
Sharps Container
Gloves
Isopropyl alcohol 70% solution hand rub solution
Pain reduction
- Good technique, skill and vein selection (metabrachial wrist veins are painful)
- Local anaesthetic infiltration (especially for large bore cannulae)
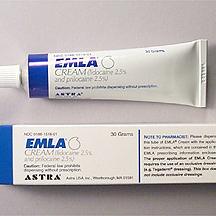
- Topical anaesthesia e.g. EMLA cream or EMLA patches.
What is EMLA

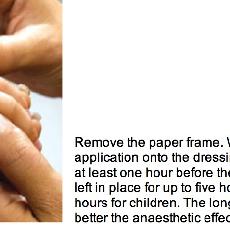
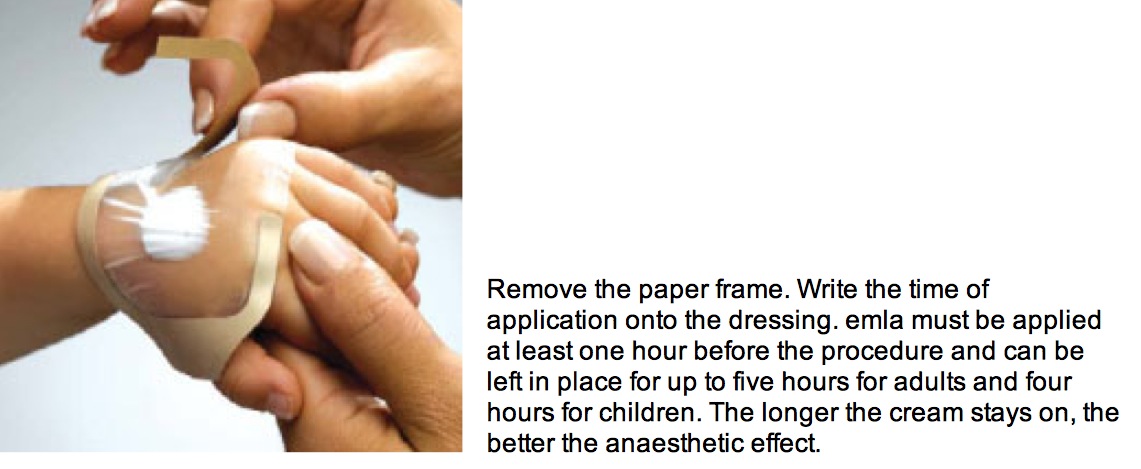
By the patient having emla applied prior to the procedure (usually 1 hour ahead of procedure), there is a significant opportunity to reduce the pain and distress for patients for a procedure involving a needle (IV cannulation, vaccination, blood testing).
Watch the photos below on how to apply Emla cream AstraZeneca:
Source: http://www.emla.co.uk/Content/How-to-use-emla.aspx?mid=2
|
EMLA cream |
EMLA Patch |
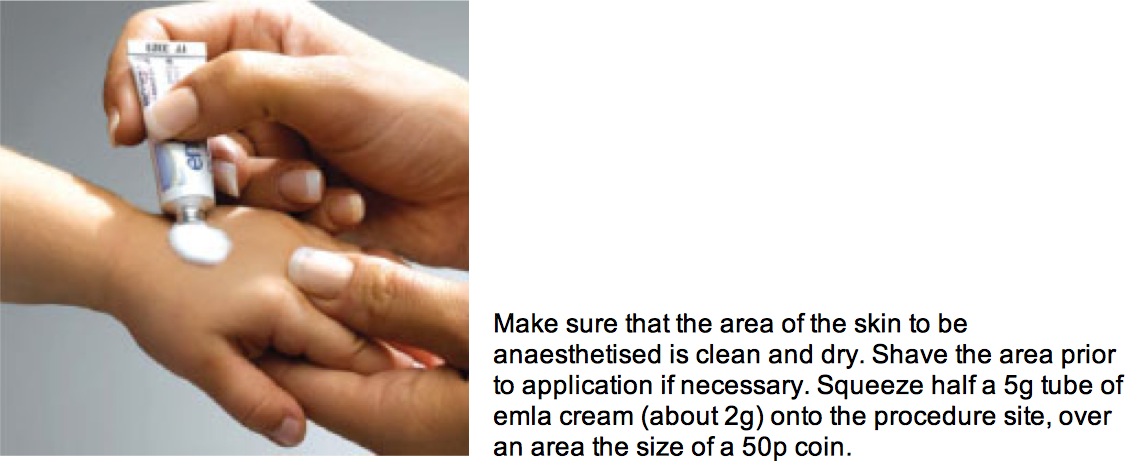
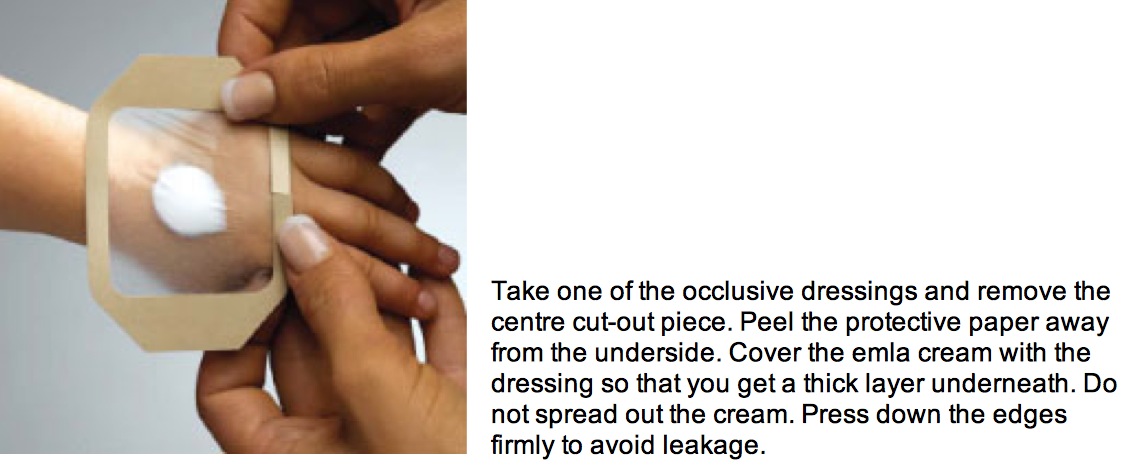
EMLA cream application: Step 1 |
EMLA cream application: Step 2 |
EMLA cream application: Step 3 |


Infection Control
Asepsis is vital as the skin is breached and a foreign object is introduced into a sterile circulating system. The main sources of microbial contamination are:
Cross infection from practitioner to patient
Skin flora
Hands should be clean, having been washed prior to the procedure, and an alcohol solution/gel applied to the hands before wearing a pair of gloves.
Gloves will protect your hands against contamination from the patients' blood and will provide some additional protection in the case of a needle-stick injury by wiping some of the contaminating blood from the needle prior the skin puncture.
The puncture site should be wiped with an isopropyl alcohol 70% swab and this should be allowed to dry (for a minimum of 30 seconds) prior to proceeding with venepuncture. This will clean any gross contamination of the patients' skin and will reduce the patients' skin flora at the site of the puncture.
The skin must not be touched or the vein re-palpated once the skin has been cleaned,
Sharps should be immediately disposed of in a sharps container, and no needles should be recapped.
This is to avoid needle-stick injuries to you or others involved in the patient's care, lowering the incidence of blood-borne viral illnesses (In particular Hepatitis B/C and HIV)
Use a no-touch technique for any part of the needle or cannula which is to puncture the patient's skin.
Technique
- Inform patient of the procedure
- Select a suitable vein - e.g. the vein in the forearm or dorsum of the hand
- Palpate the vessel
- Apply a tourniquet proximal to the selected site
- Wear gloves
- Cleanse skin with an alcohol wipe
- If required, infiltrate skin over the proposed puncture site with 1 % lignocaine solution
- Hold patient's hand with your non-dominant hand, using your thumb to keep skin slightly tense, and anchor vein to prevent it rolling
- Inspect needle tip to ensure cutting edge is smooth and intact. Place cannula needle in line with the direction of the vein, with bevel pointing upwards to reduce tissue trauma
- At a low angle (10-30 degrees), gripping the cannula, insert the needle through the skin and into the vein, as identified by the flashback of blood into the chamber at the hub of the cannula
- Once inside the vein advance the needle 2-3mm in parallel motion (10 degrees) to ensure the cannula is also in the vein
- Either: a- Withdraw the needle stylet (holding the cannula steady) about 5mm to avoid piercing the posterior vein wall, there should be a further flashback of blood along the shaft of the cannula and now advance the cannula into the vein Or b- Slide the cannula over the needle into the vein.
- Never re-insert the stylet as this can sheer off the end of the cannula and cause an embolus.
- Release the tourniquet
- Place a finger over the vein above the tip of the cannula to prevent bleeding as you now remove the needle stylet.
- Place a luer cap with a valve on the cannula and safely dispose of the needle
- Flush the cannula with isotonic saline to ensure cannula patency. Proper IV placement is confirmed by a smooth saline flush without evidence of extravasation into the subcutaneous tissues.
- Cover the insertion site and immobilize the cannula by applying a sterile non-occlusive dressing

Care after insertion
Once sited the cannula should be flushed with either normal saline. The site should be regularly inspected for signs of phlebitis.
Peripheral cannulae should be re-sited every 48-72 hours to reduce the risk of phlebitis, but this may be difficult in patients with difficult veins.
If the cannula is to be used intermittently, flush before injecting any drug and then flush again after drug administration.
Flush-----Drug-----Flush
Complications
If Cannulation is unsuccessful do not reinsert stylet into cannula as it may shear off the cannula and lead to catheter embolism.
Chemical irritation from the infusion may cause phlebitis and pain. An acidic pH and high osmolality are particularly likely to cause problems. Dilute solutions appropriately for peripheral administration. Where osmolarity of the solution exceeds 600molmolal avoid peripheral venous administration and give into a central vein.
The cannula may be blocked from thrombus formation if it is not kept flushed.
Extravasation occurs when cannula pulls out of the vein or becomes partly occluded by venous constriction causing backflow of the infusate through the puncture site into surrounding tissues. The patient may complain of tightness, burning and discomfort around the IV site and there may be swelling and blanching of the tissues.
Treatment is to stop infusion immediately and re-site cannula.
A haematoma is formed when blood leaks into the tissues surrounding the insertion site after failure to penetrate vein properly during insertion, puncture of the posterior wall of vessel or removal of the cannula. Treatment is to apply pressure to puncture site for 3-4 minutes.
Infection: This can cause phlebitis and thrombus formation. It is prevented by good aseptic technique, keeping the dressings clean and not leaving the cannula in for any longer than necessary.
1- Phlebitis: This is acute inflammation of the intima of the vein. It is caused by mechanical and chemical irritation, or by microscopic particles that may contaminate infusion fluids. Clinically there is erythema over the cannulated vein and surrounding skin and it is warm to touch.
Treatment is to remove the cannula.
2- Thrombophlebitis: This is acute inflammation of the intima of the vein with the formation of a thrombus.
It is commonly associated with infection at the site of the cannula and may present with raised white cell count, lymphadenopathy and positive blood cultures. There may be pus visible around skin entry site.
Treatment is to remove cannula and commence parenteral antibiotics.
Cannulating an artery can interfere with blood supply to an extremity or surrounding tissue and can cause necrosis of the tissue. Should an artery be inadvertently cannulated, remove the cannula immediately and apply direct
pressure for 5 minutes.
Nerve Damage
It is also possible for the IV needle to penetrate and injure a nerve, and for bruising and bleeding to irritate a nerve. Nerves are invisible from the skin surface so it is easy to understand how this could happen. If the patient feels a sudden sharp pain radiating along your arm as the IV is inserted, this may be a sign that the needle has come into contact with a nerve.
Removal
Cannulae should not remain in situ for any longer than necessary to reduce the risks of infection. Consideration should be given to re-siting them after 48-72 hours.
When removing the cannulae, pressure should be applied to the site for at least a minute and the site should be occluded with a sterile dressing.

