")

Phlebotomy
Definition
The etymology of the word Phlebotomy comes from Greek word root phleb/o, meaning vein, /tom/ meaning to cut or puncture, and the suffix /-y which means process. Thus phlebotomy simply means "the process of puncturing veins".
Traditionally, phlebotomy referred to the ancient practice of bloodletting, which involved the withdrawal of larger amounts of blood in an attempt to cure illnesses and disease.
In modern medicine, this practice has been largely abandoned but the term phlebotomy is still widely used for the withdrawal and collection of blood from a vein, artery, or the capillary bed into blood specimen collection tubes for laboratory analysis or blood transfusion. Therefore, blood specimen collection is performed by the phlebotomist.
Read more: http://wiki.answers.com/Q/What_is_phlebotomy#ixzz1YfJmrutp
Equipment
- Tray
- Mediswab
- Tourniquet
- Small adhesive dressing.
- Sharps Container
- Gloves
- Isopropyl alcohol 70% solution hand rub solution
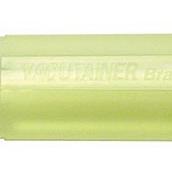
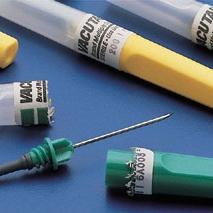
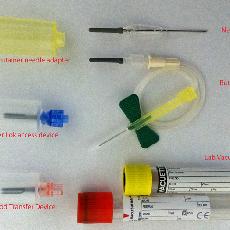
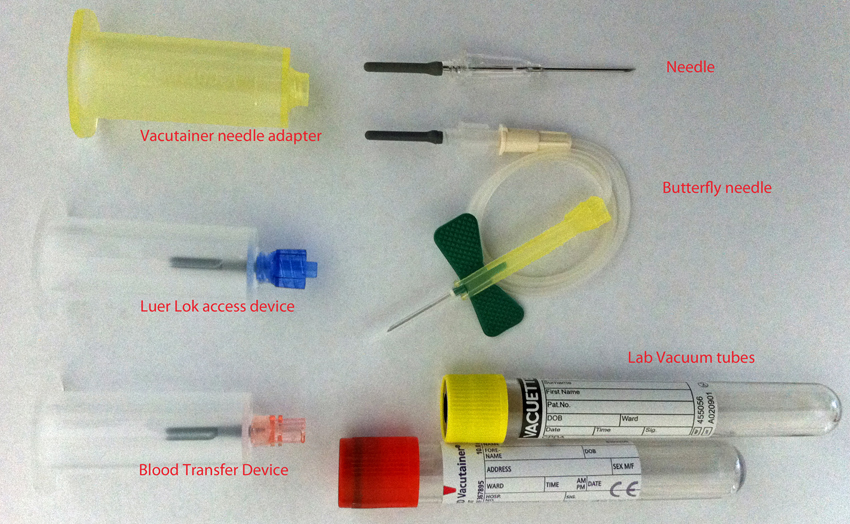
- ‘Vacutainer’ system:
- Or Sterile syringe, Sterile needle, Appropriate evacuated tube
|
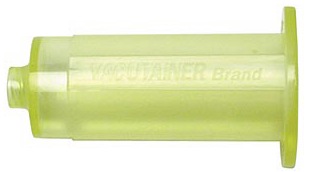
Vautainer needle holder |
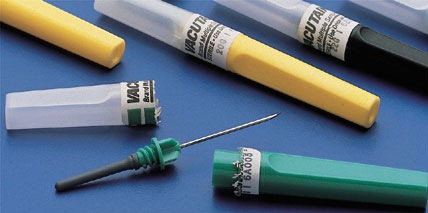
Vacutainer needles |
Vacutainer system |
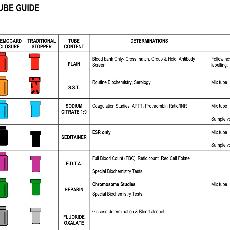
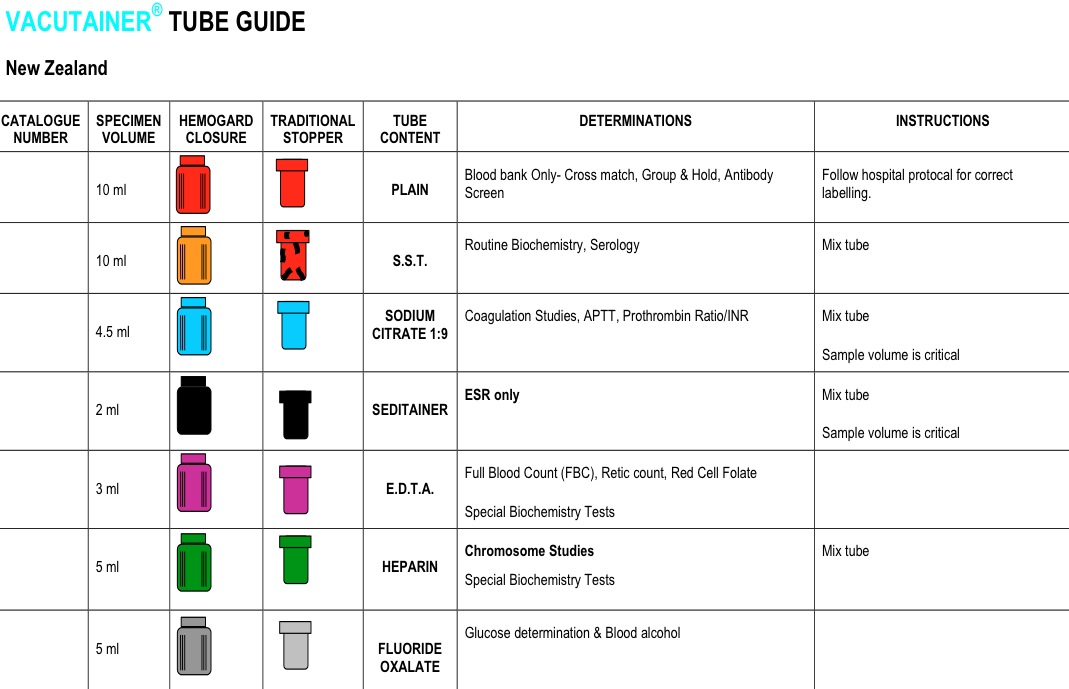
Tubes Guide |
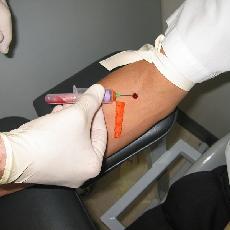
Blood draw filling a purple top vacuum tube |

Procedure
Assemble equipment
Inform patient of procedure
Select a suitable vein - e.g. the vein in the antecubital fossa or forearm
Palpate the vessel to exclude the possibility that it is an artery
Apply a tourniquet medial to the selected site
Put on gloves
Cleanse skin with an alcohol wipe
Fix the vein by applying pressure to skin over the vein, approximately two inches below venepuncture site
Leaving the coloured shield on the needle, screw it onto the holder
Remove shield and approach the skin, with needle bevel uppermost at an angle of 35~45 degrees
When the needle has penetrated the skin, realign it with the vein and reduce the angle to about 15 degrees
Introduce the tube into the holder, with middle and forefinger supporting flange of the holder, push the tube with the thumb to the end of the holder, puncturing the diaphragm of the stopper.
As soon as blood starts to flow into the tube, remove the tourniquet.
When blood flow ceases, gently disengage tube from the holder - if more samples are required, repeat from stage 12
Tubes with additives should be gently inverted to mix contents - shaking may cause haemolysis.
Always draw samples without additives first (see videos below).
Place a clean swab or piece of cotton wool over the needle as it is gently withdrawn, pressure should be applied to the site until haemostasis occurs, at which time an adhesive dressing is applied. It is not recommended that the patient bend their arm as this increases the intravascular pressure.
Ensure all samples are clearly labelled
Never re-sheath needles as this is the commonest source of needles stick injury.
Ensure all sharps are disposed of safely and examine holder for any contamination, in which case it should be discarded - in normal practice the holder does not come into contact with blood products and is intended for multiple uses.

|
Download the video file [0.0 MB] |
|
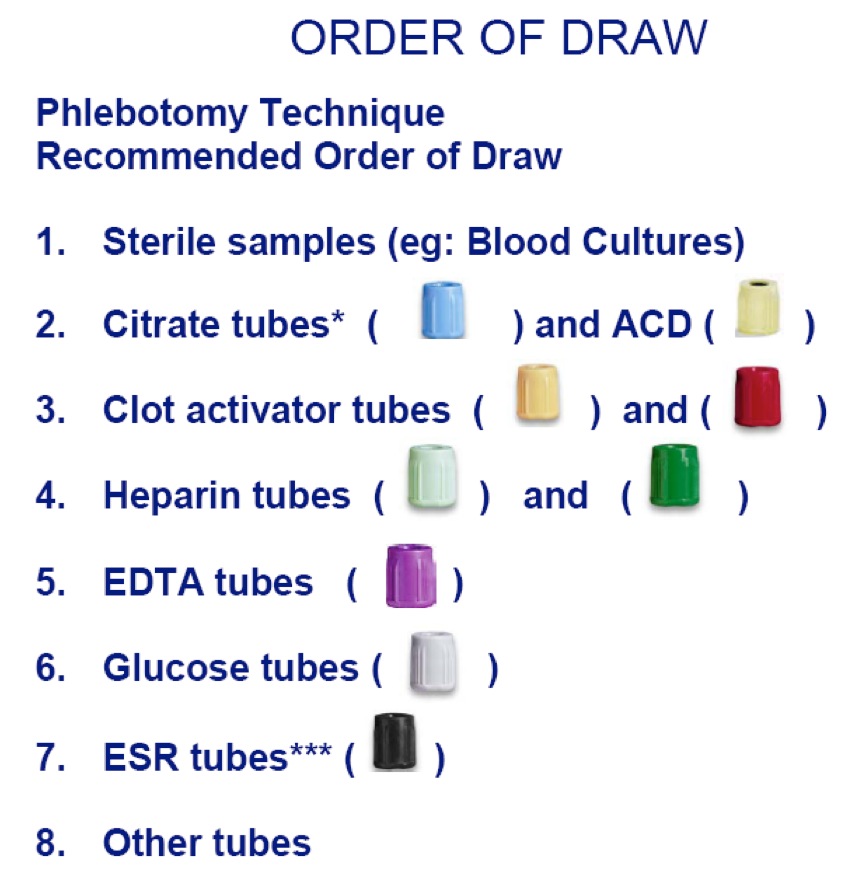
Venipuncture Order of Draw
Download the video file [0.0 MB] |
|
Order of draw |