|
|
CourseBuilder Support www.coursebuilder.auckland.ac.nz |
|
|
")
|

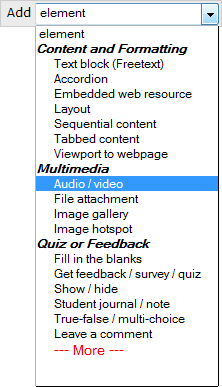
Audio/video
Audio/video inserts a video or audio clip into the page. Audio/video files are uploaded to CourseBuilder from your local computer.
Recommended formats: MP4, MOV, FLV (Flash video) for people/places, standard Flash SWF for screen recordings.
Accepted formats: FLV, MOV, MP4, M4V, MPEG, MPG, QTL, SWF, MP3, MID, WAV, WMV.
Note: Your audio/video file will be transcoded to a compatible format for the web, during which there will be a delay while the background process completes.
For other ways to add audio or video, see: CourseBuilder basics » Insert audio or video.
Add Audio/video
Select Audio/video from the element selection list. If you don't have this option, see Customise your elements list
Choose an existing file that was uploaded earlier or Upload a file.
Browse to the file on your local computer. Select it and click Open.
The Width and Height of the video will be determined automatically upon clicking Save.
Press Save. Note: depending on the speed of your Internet connection, it may take a while to upload.
![]() Tip: CourseBuilder will take a still image from the start of the video and display it as the paused video's placeholder image (poster frame). If you don't like the poster frame you can upload your own.
Tip: CourseBuilder will take a still image from the start of the video and display it as the paused video's placeholder image (poster frame). If you don't like the poster frame you can upload your own.

![]() Tip: If you are not happy with the width and height that was determined automatically, you can input your own width and height manually.
Tip: If you are not happy with the width and height that was determined automatically, you can input your own width and height manually.
Options
Media alignment positions the media and Description. Adding a description is optional, though if you select 'above' or 'below description', the media will be centered on the page.
Include a text link to download the file enables students to download the media file to their computer. Depending on the file type (e.g. mp3, mp4), they may also download/transfer it to their mobile device.
Add a text Caption underneath the media if you wish. If you use a 'free to air' television programme or radio broadcast, you should include the information relating to the Screenrights Tertiary Licence.
An optional Transcript will be available when students click a button. The Text and Colour of the button can be changed to suit your design. Choose a colour from the palette ![]()
Subtitles can be added if you have a voice commentary of the video. Follow the exact syntax as demonstrated via the 'Subtitle example' link. Click 'Play the media' link to preview the video and jot down the time codes or download and install Subtitle Workshop and export your subtitles as an .srt file.
You may Style the Audio/video element according to a number of templates.

Insert in-video activity
After saving a video(/audio) you are given the option to Insert an in-video activity. This will display additional content, quizes or activities at a specified time during playback. Students will see the additional content appear underneath the video.
You can add multiple in-video activities to the same video, e.g.
- at 02:45s you may add a multi-choice quiz
- then at 03:55s the quiz is replaced by: "for more information see: www.example.com".
Step one
Click Insert in-video activity

Step two
Specify the minutes and seconds mm:ss for when to display the extra content, quiz or activity.
Choose whether to pause the media at this time
Click Save

Step three
The in-video activity will add a "Media plaback time" bar underneath the video. Add any (nested) elements that you like underneath this bar. The content that you add will be displayed during playback, at the time specified.


